
Now that craft class is in session…
Raise your hand if you like spending extra money on party decorations, for no reason…
Anyone?
Okay, raise your hand if you like pretty party decorations for the cheapest price possible…
(I’m raising both hands, a foot and my cup of coffee, right now.)
Lately I’ve been obsessed with paper flowers and how fancy they can look, even though they’re so simple to make! I started thinking about the different decorations I could create (specifically for a child’s birthday party).
This bouquet, that I’ve decided to call the ‘Uni-quet’, (get it? Unicorn + Bouquet = Uni-quet? It’s okay, my boyfriend rolled his eyes when I told him that too) only cost me $14 to make!
I hope it helps somebody, somewhere throw the perfect unicorn party for their child!
Below are the materials I used, but feel free to substitute with any colors/cheaper materials you can find!
Materials:
- Glass (or plastic) Vase (I got mine from the dollar store)
- Fairy Lights (I suggest warm white)
- Construction Paper, with assorted colors and patterns (I got mine from Target for $7.99)
- Scissors
- Hot glue gun / hot glue
- Clear tape
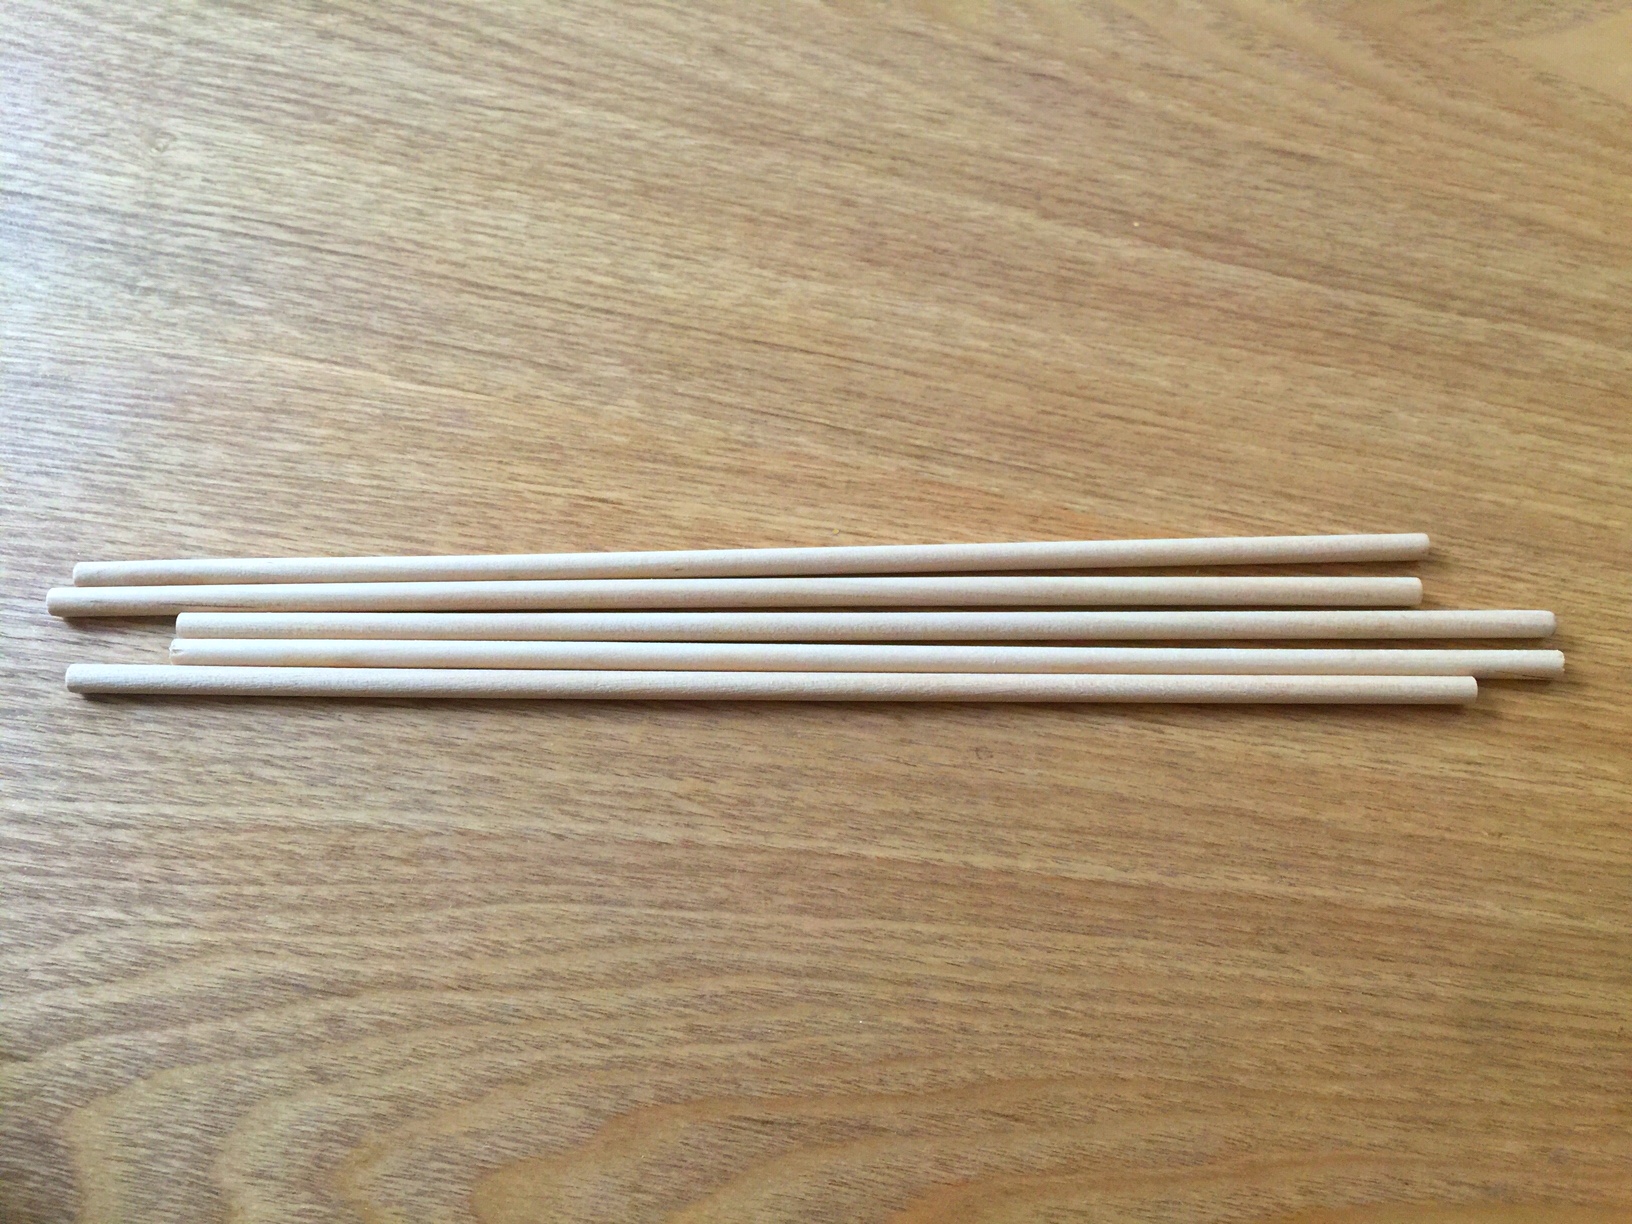
- Wooden dowels
Step 1
Fold your white (or whichever color you choose first) piece of paper, in half, the long way.
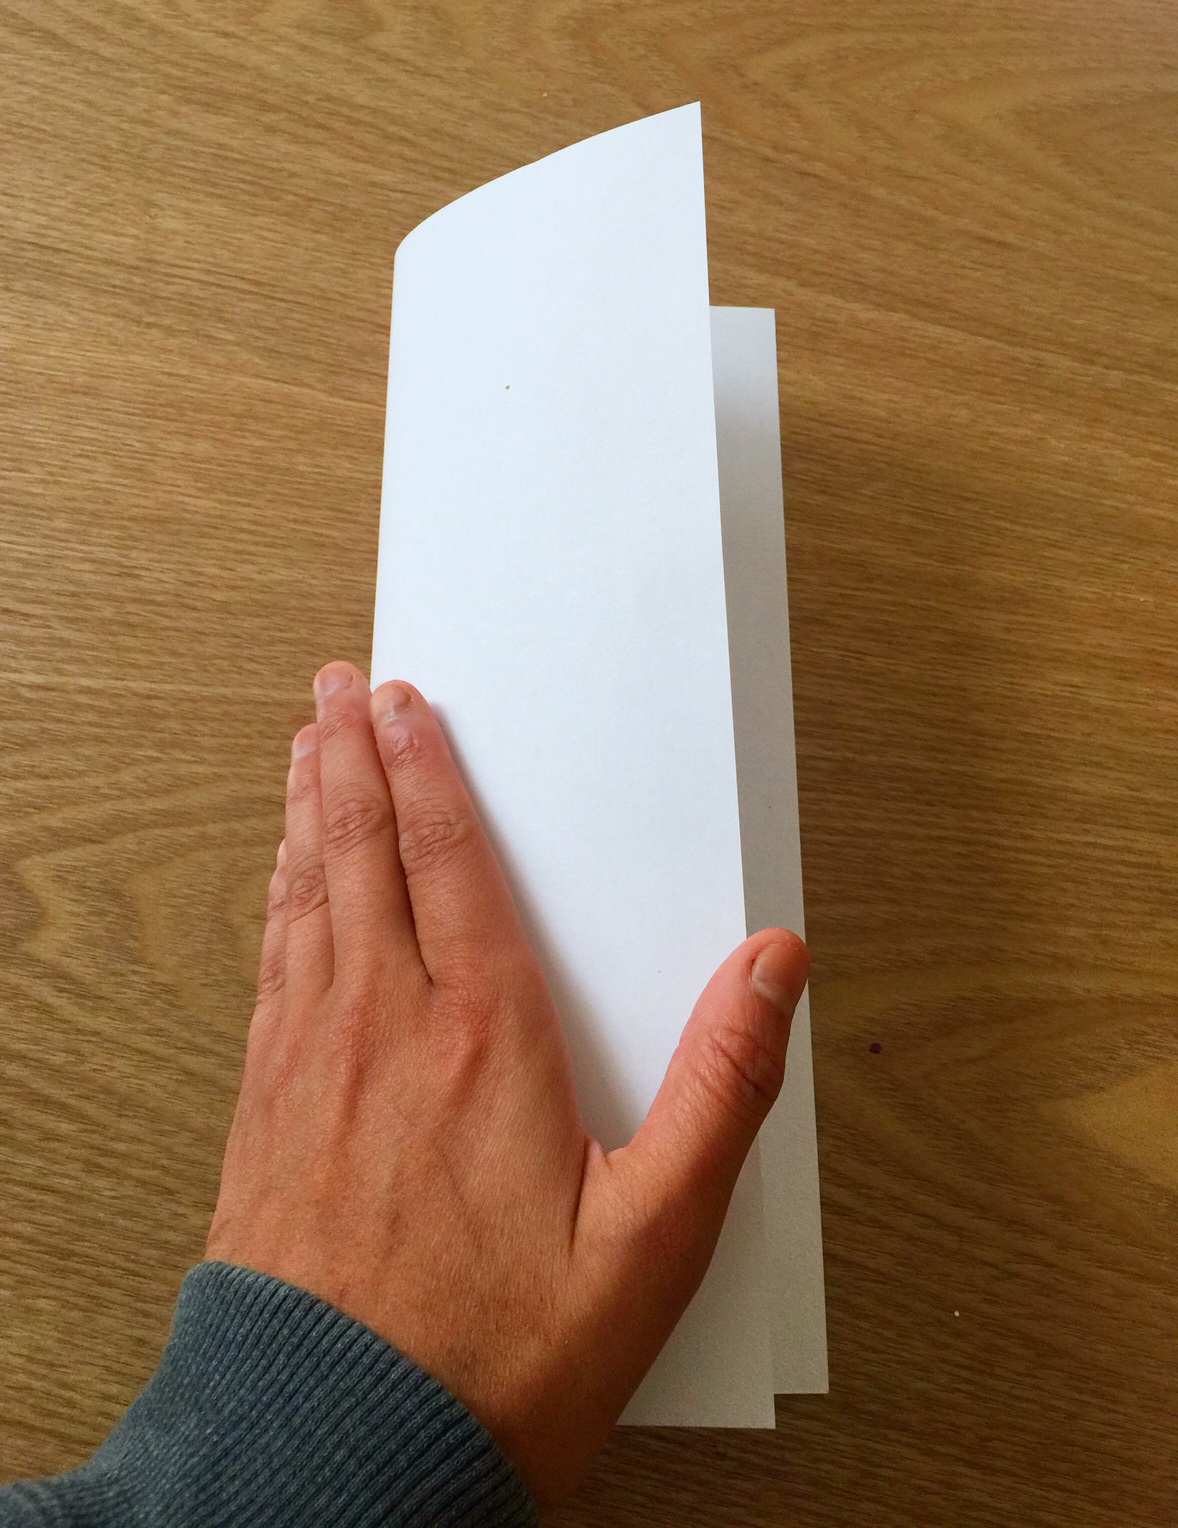
Step 2
Use your tape, to seal the open side of your folded piece of paper. It doesn’t have to be taped perfectly closed, you really only need about three small pieces of tape.

Step 3
Without cutting all the way to the edge of your folded paper, cut slits on the fold of your paper. Be careful not to cut all the way to the edge of the paper!
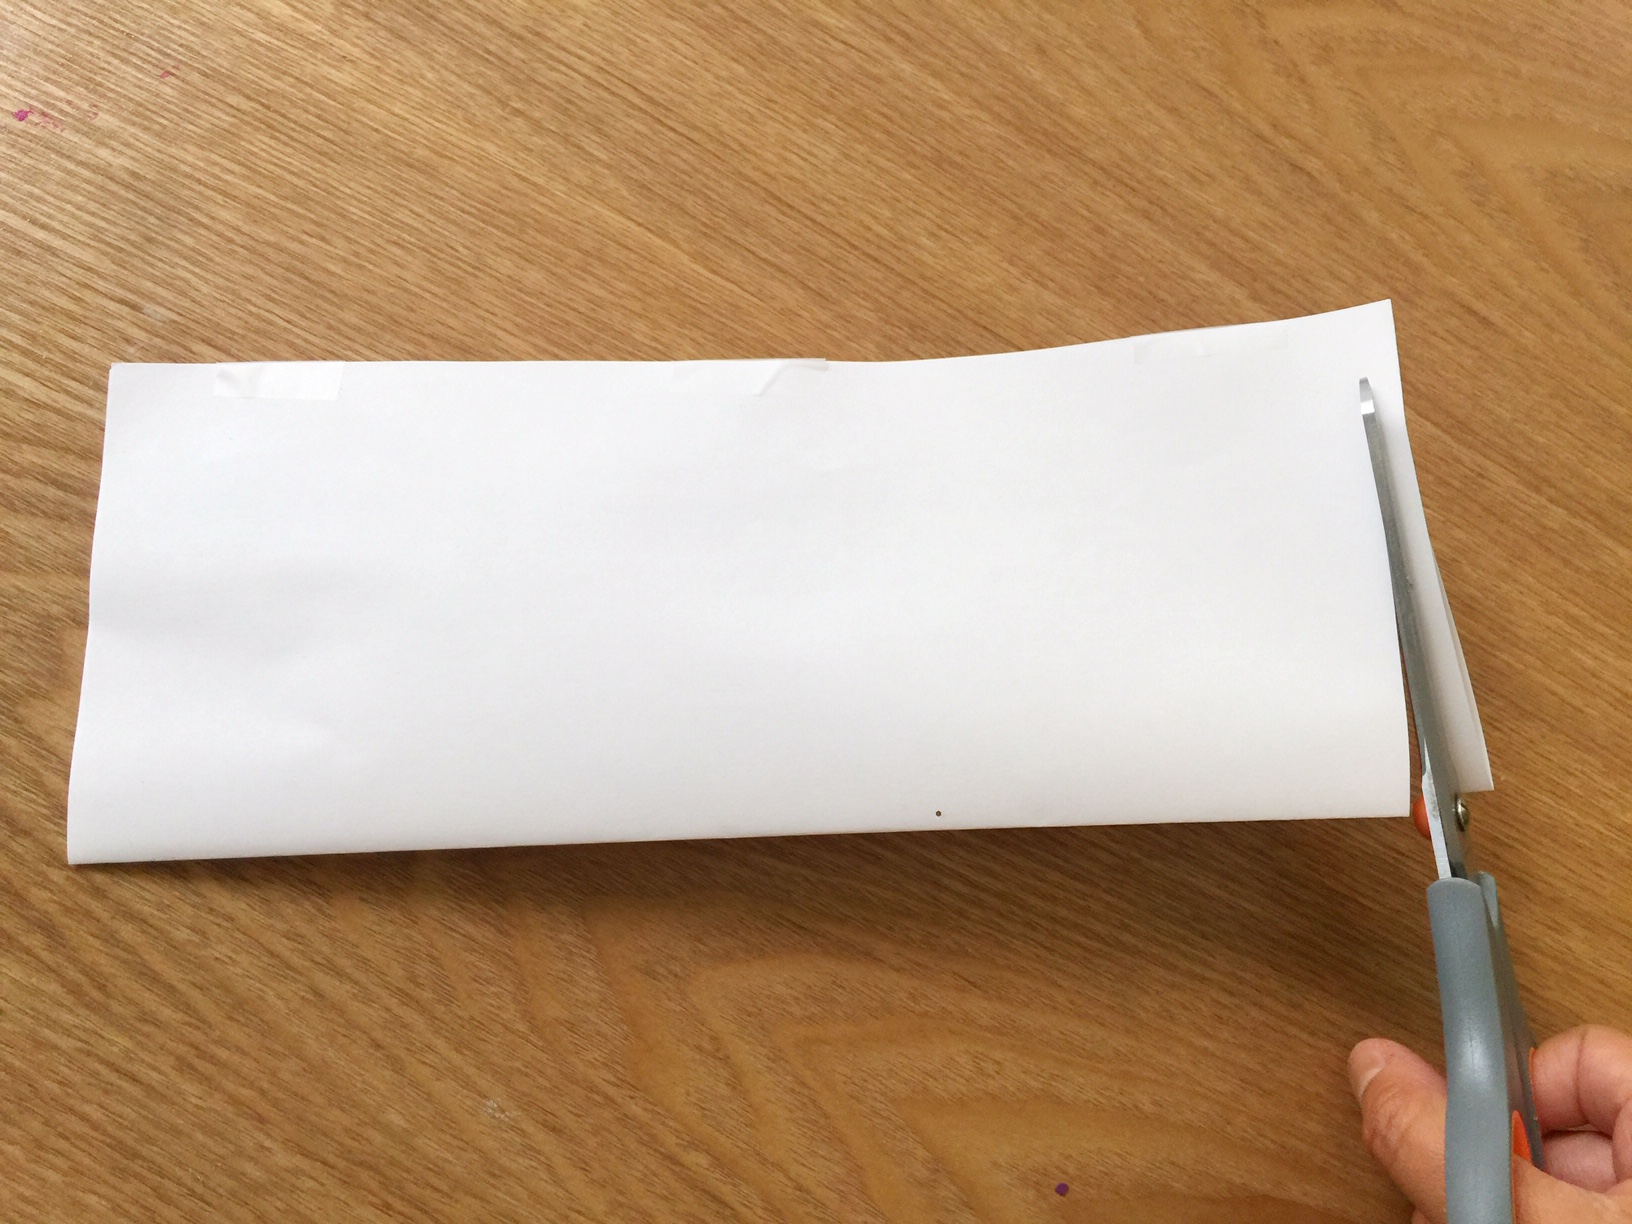
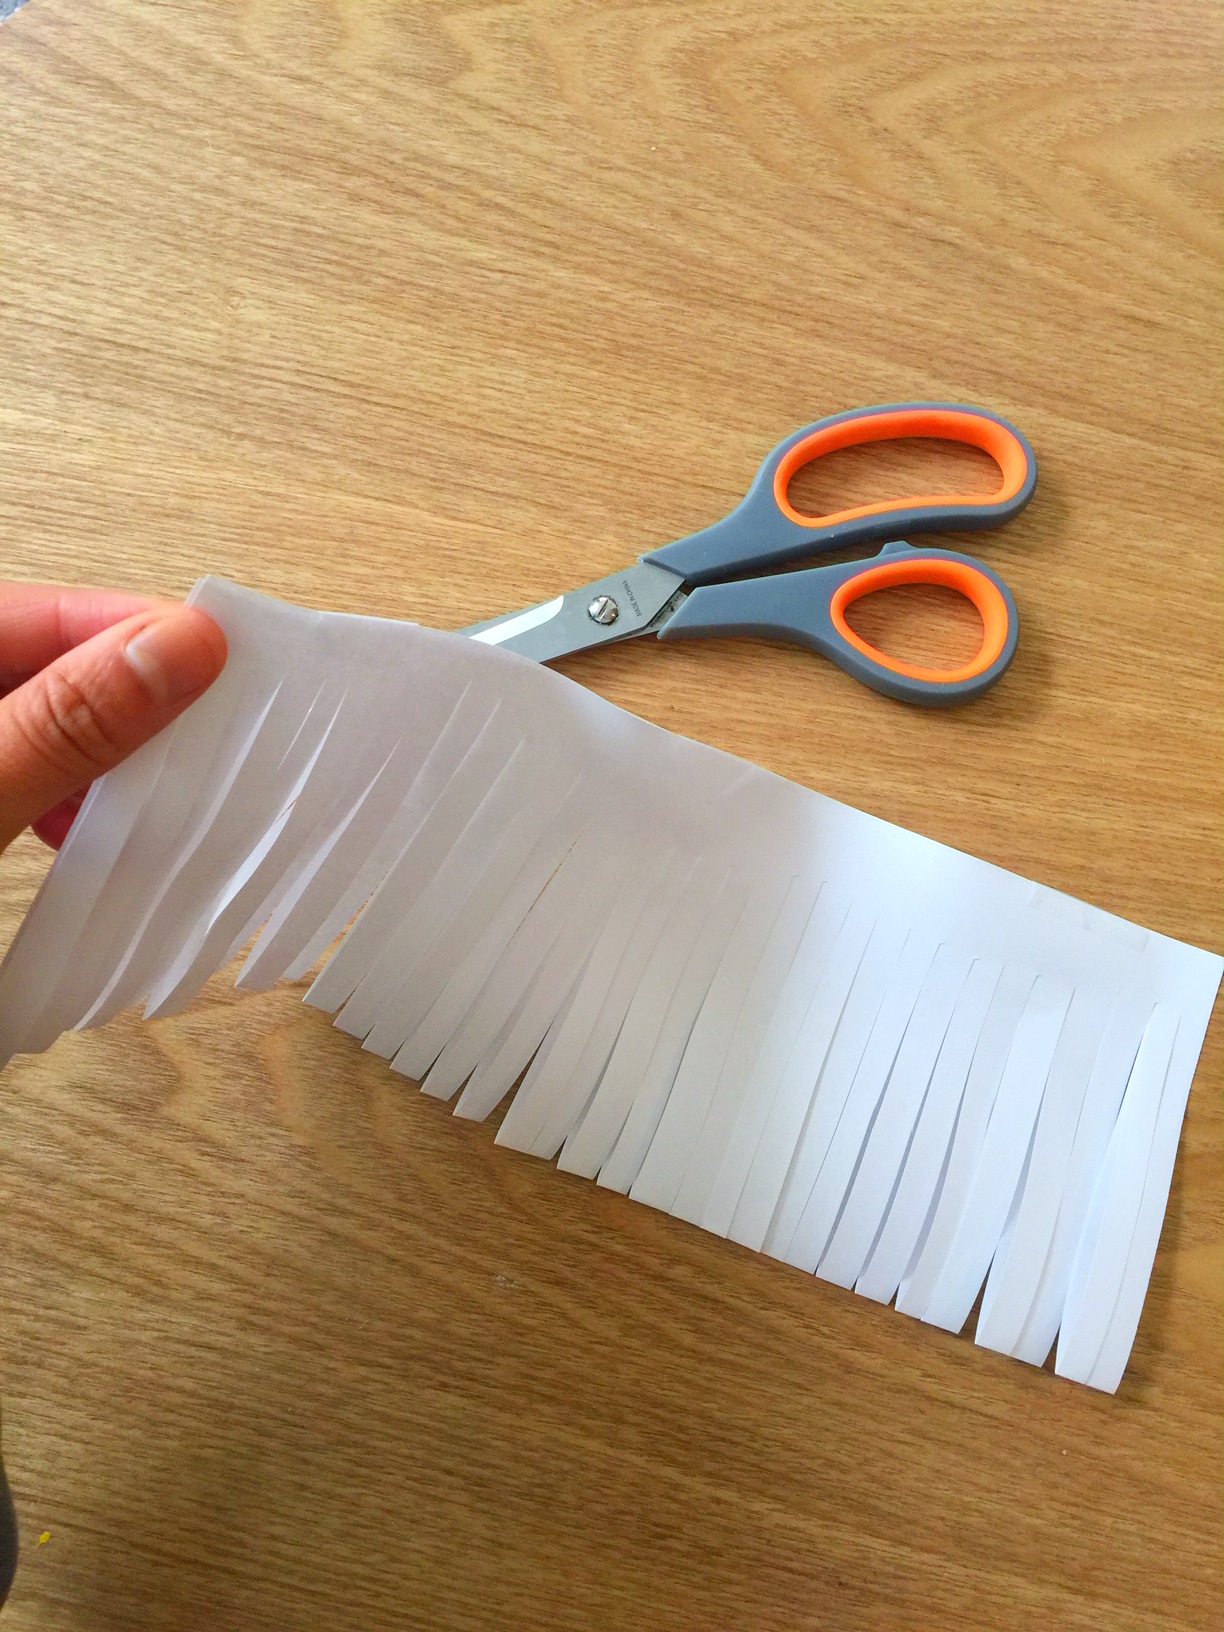
Do this all the way across your folded piece of paper. When you’re finished, it should look like this:
Step 4
Start at the edge of your paper (on the side you didn’t cut) and begin rolling.
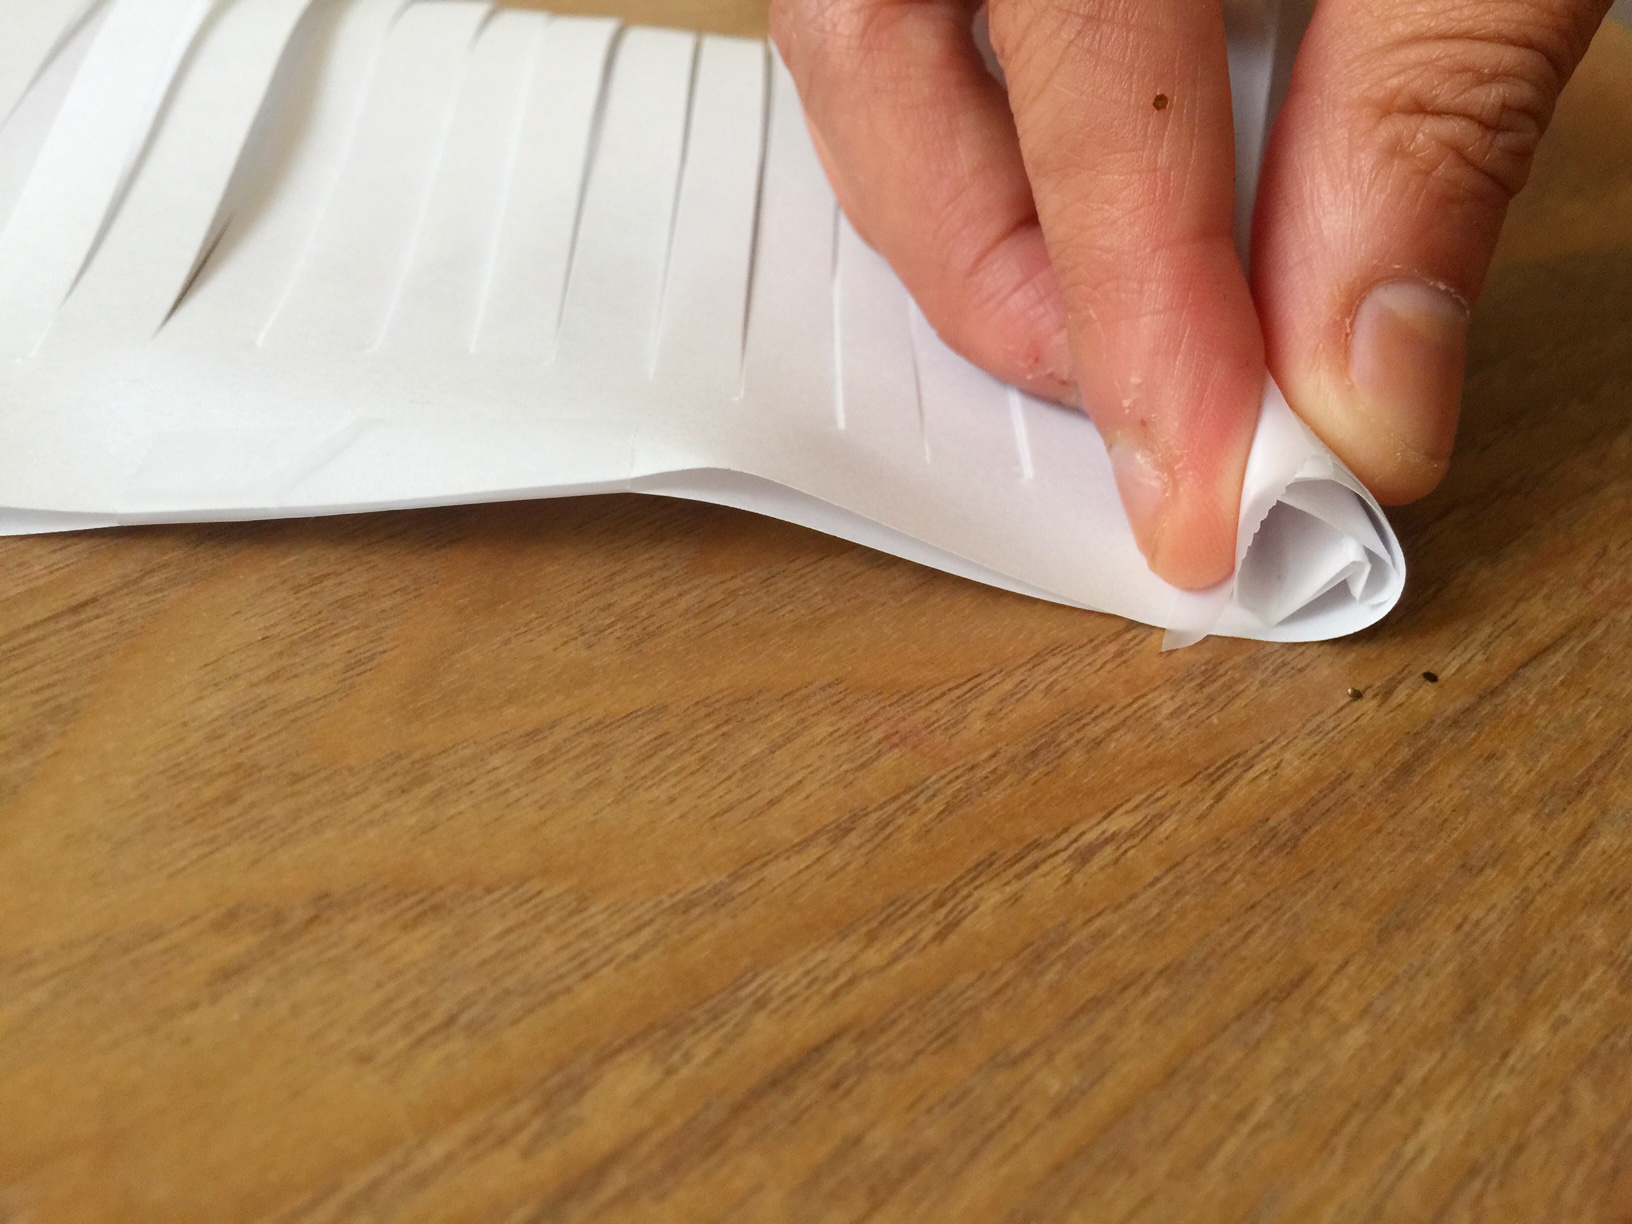
Be sure to add a piece of tape, or dot of hot glue, every couple of centimeters to keep your roll in place. When you’re finished it should look like this:

Step 5
Pull the petals of your flower down, until you have a full pom pom.
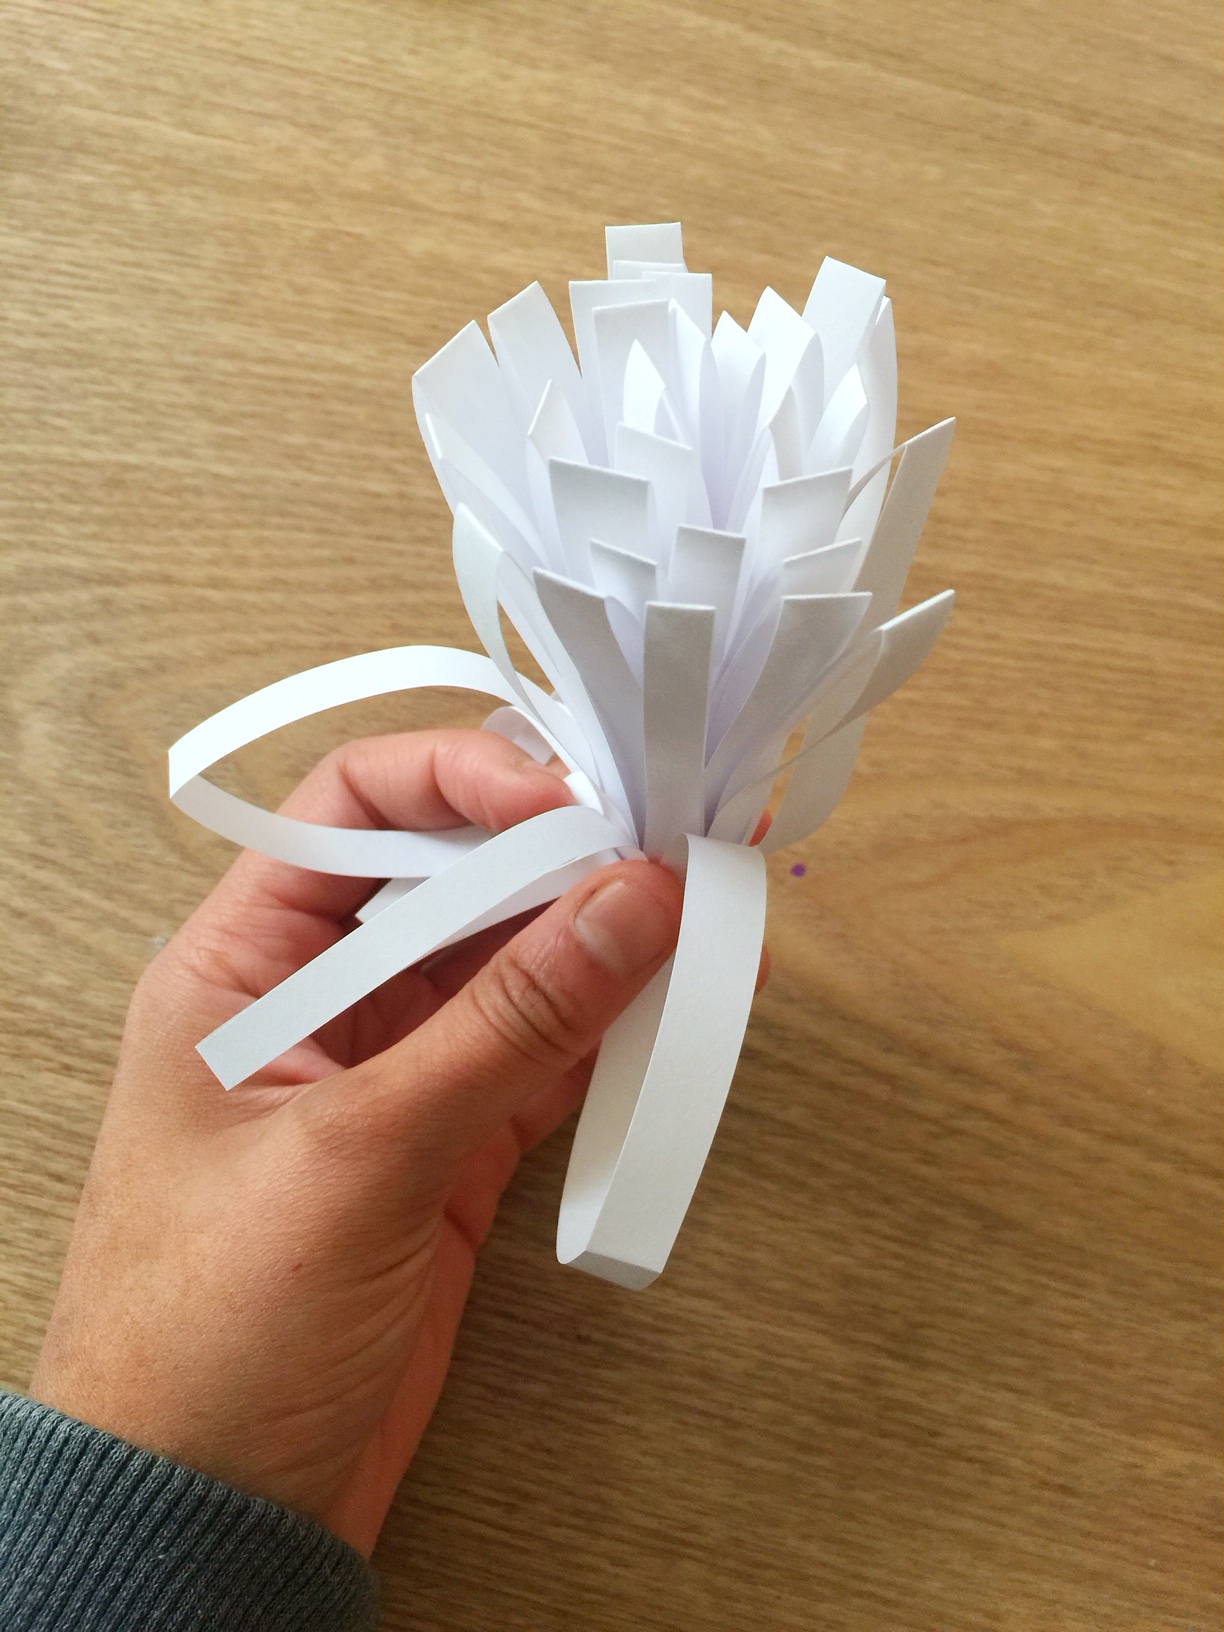
When you’re finished it will look like this:

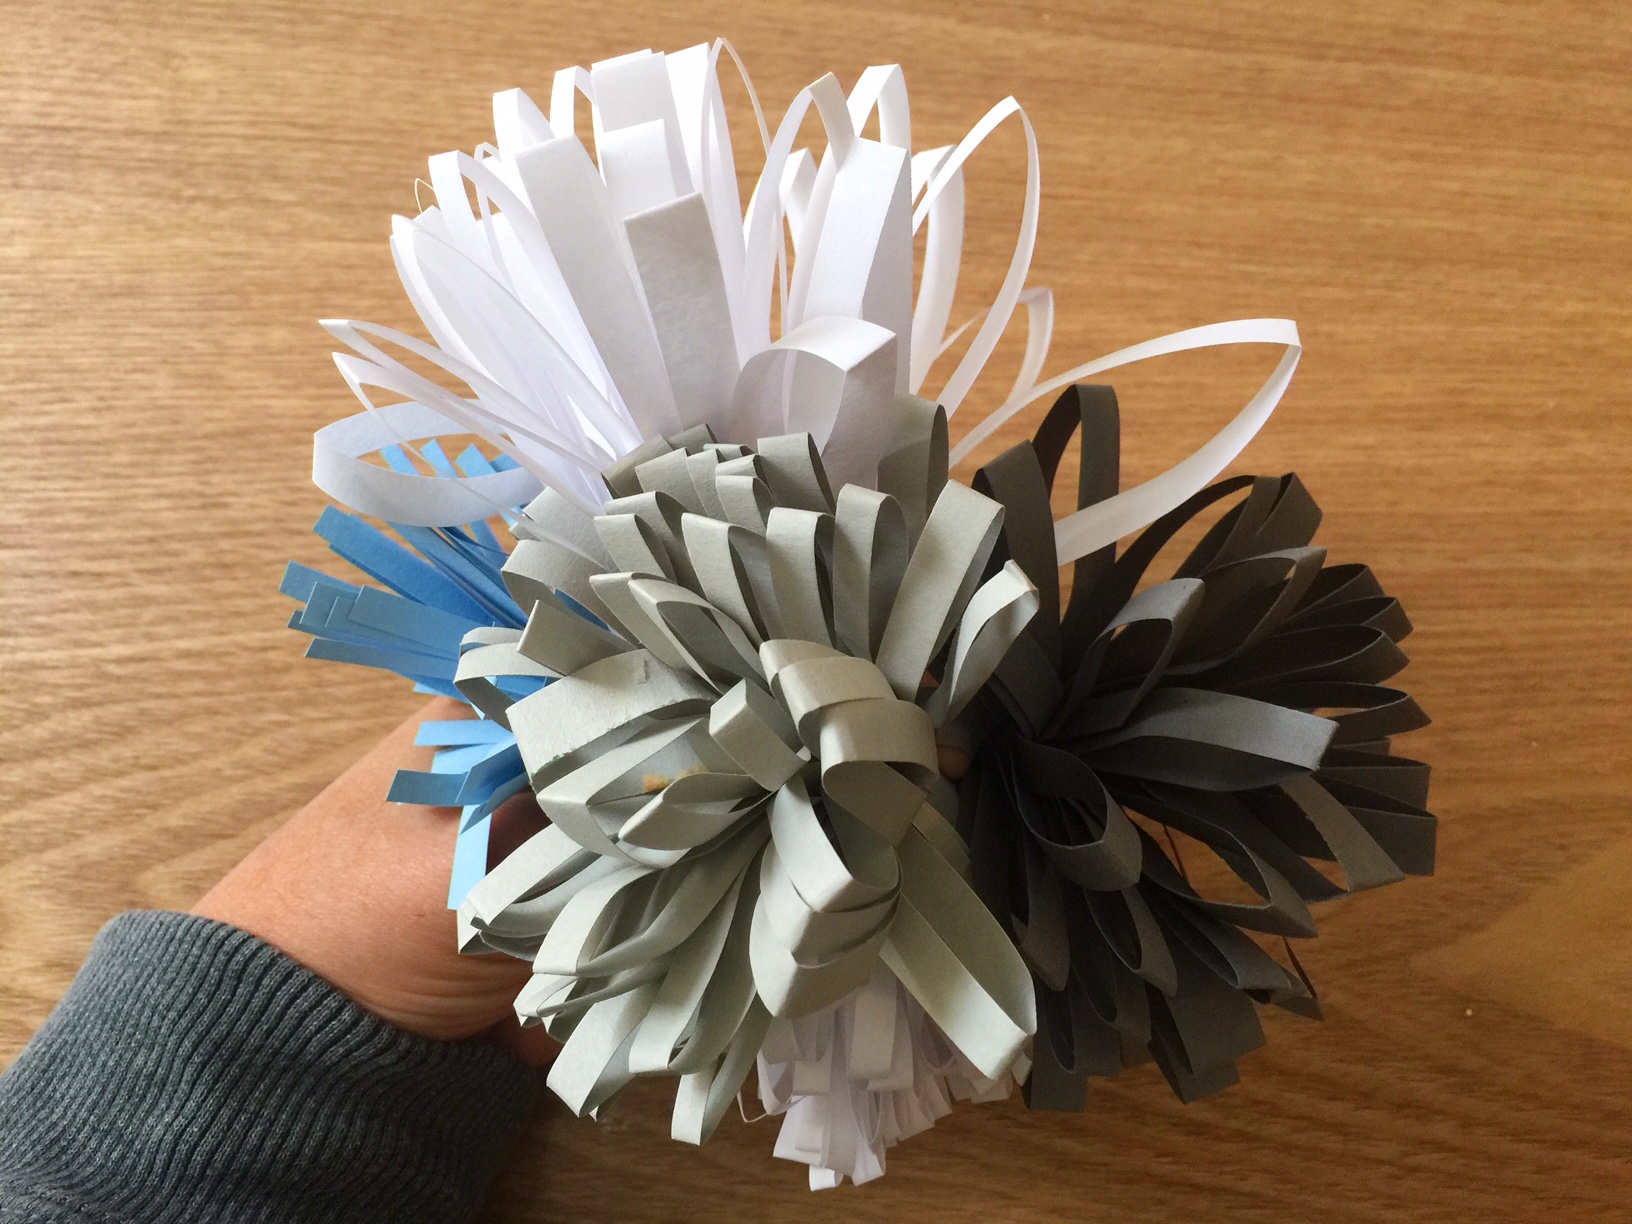
Step 6
Repeat, with multiple colors. I chose white, light and dark gray, and light blue.
Step 7
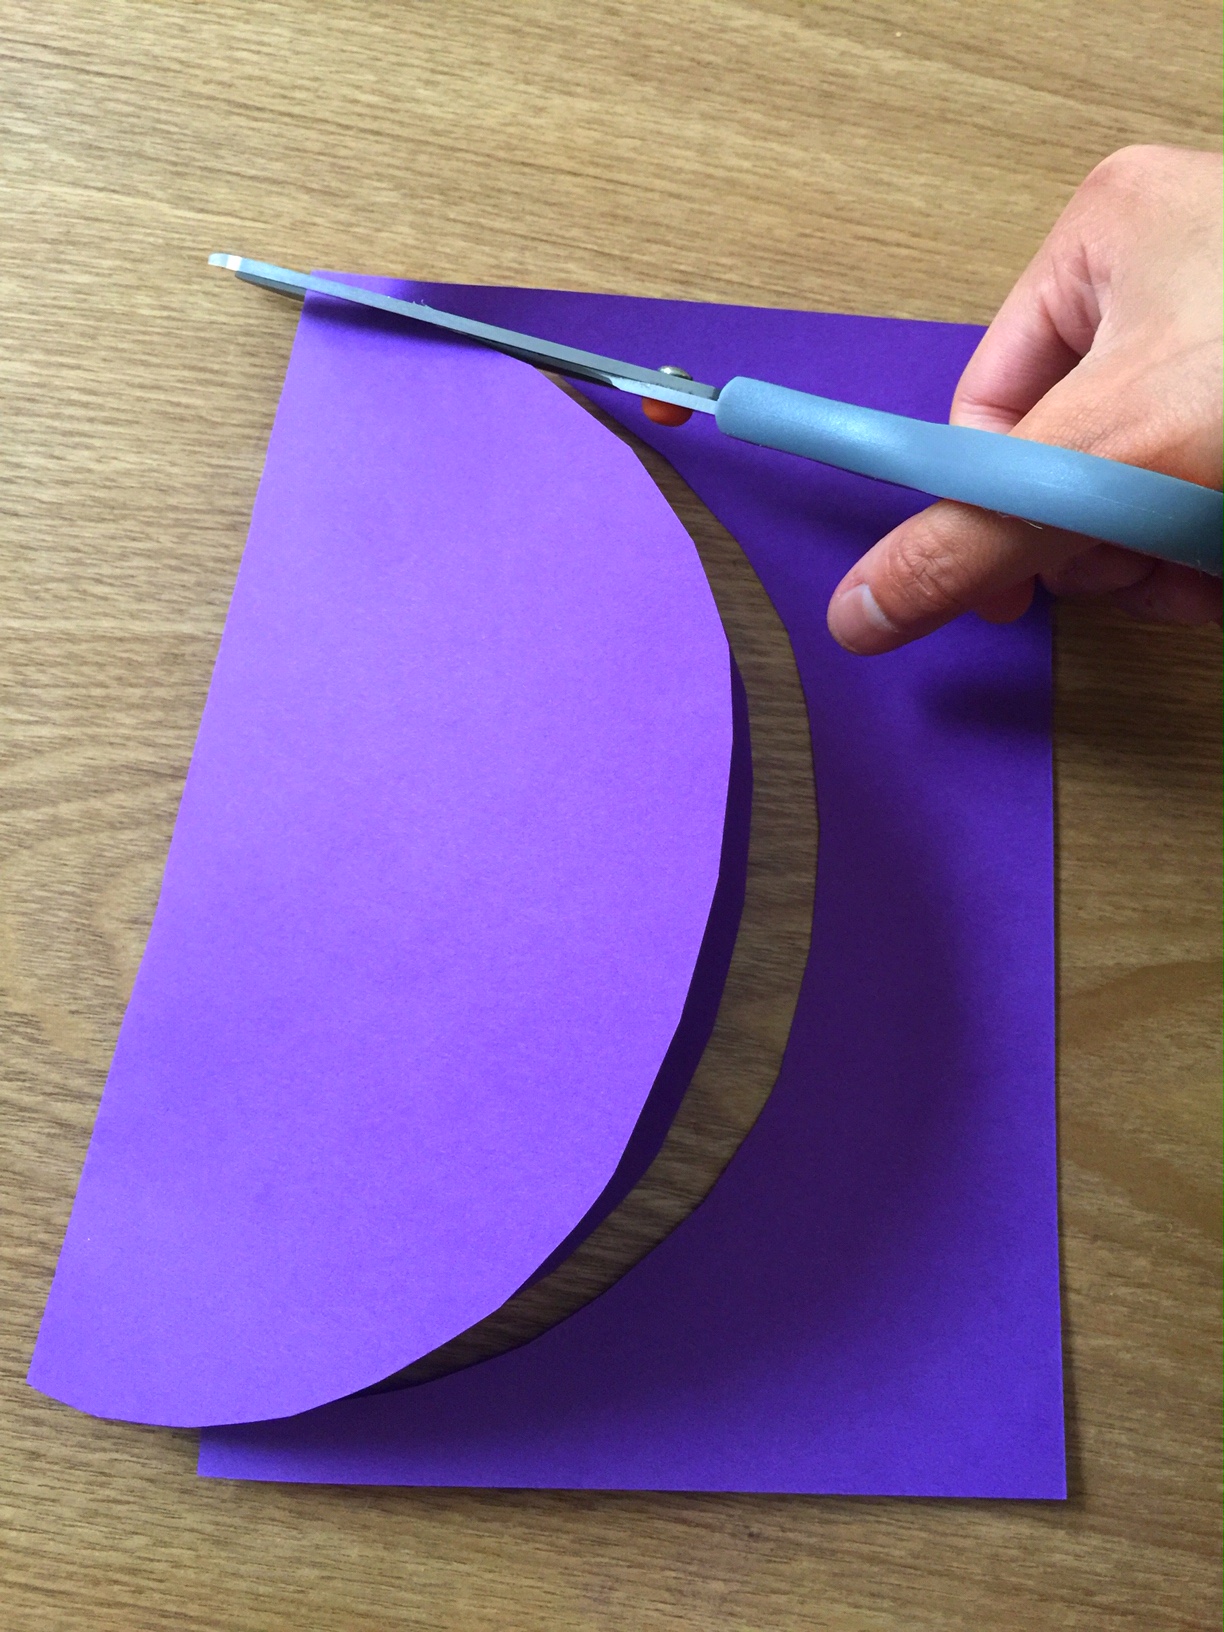
Choose another colored piece of paper and fold it in half, the short way.

Step 8
Cut a circle.
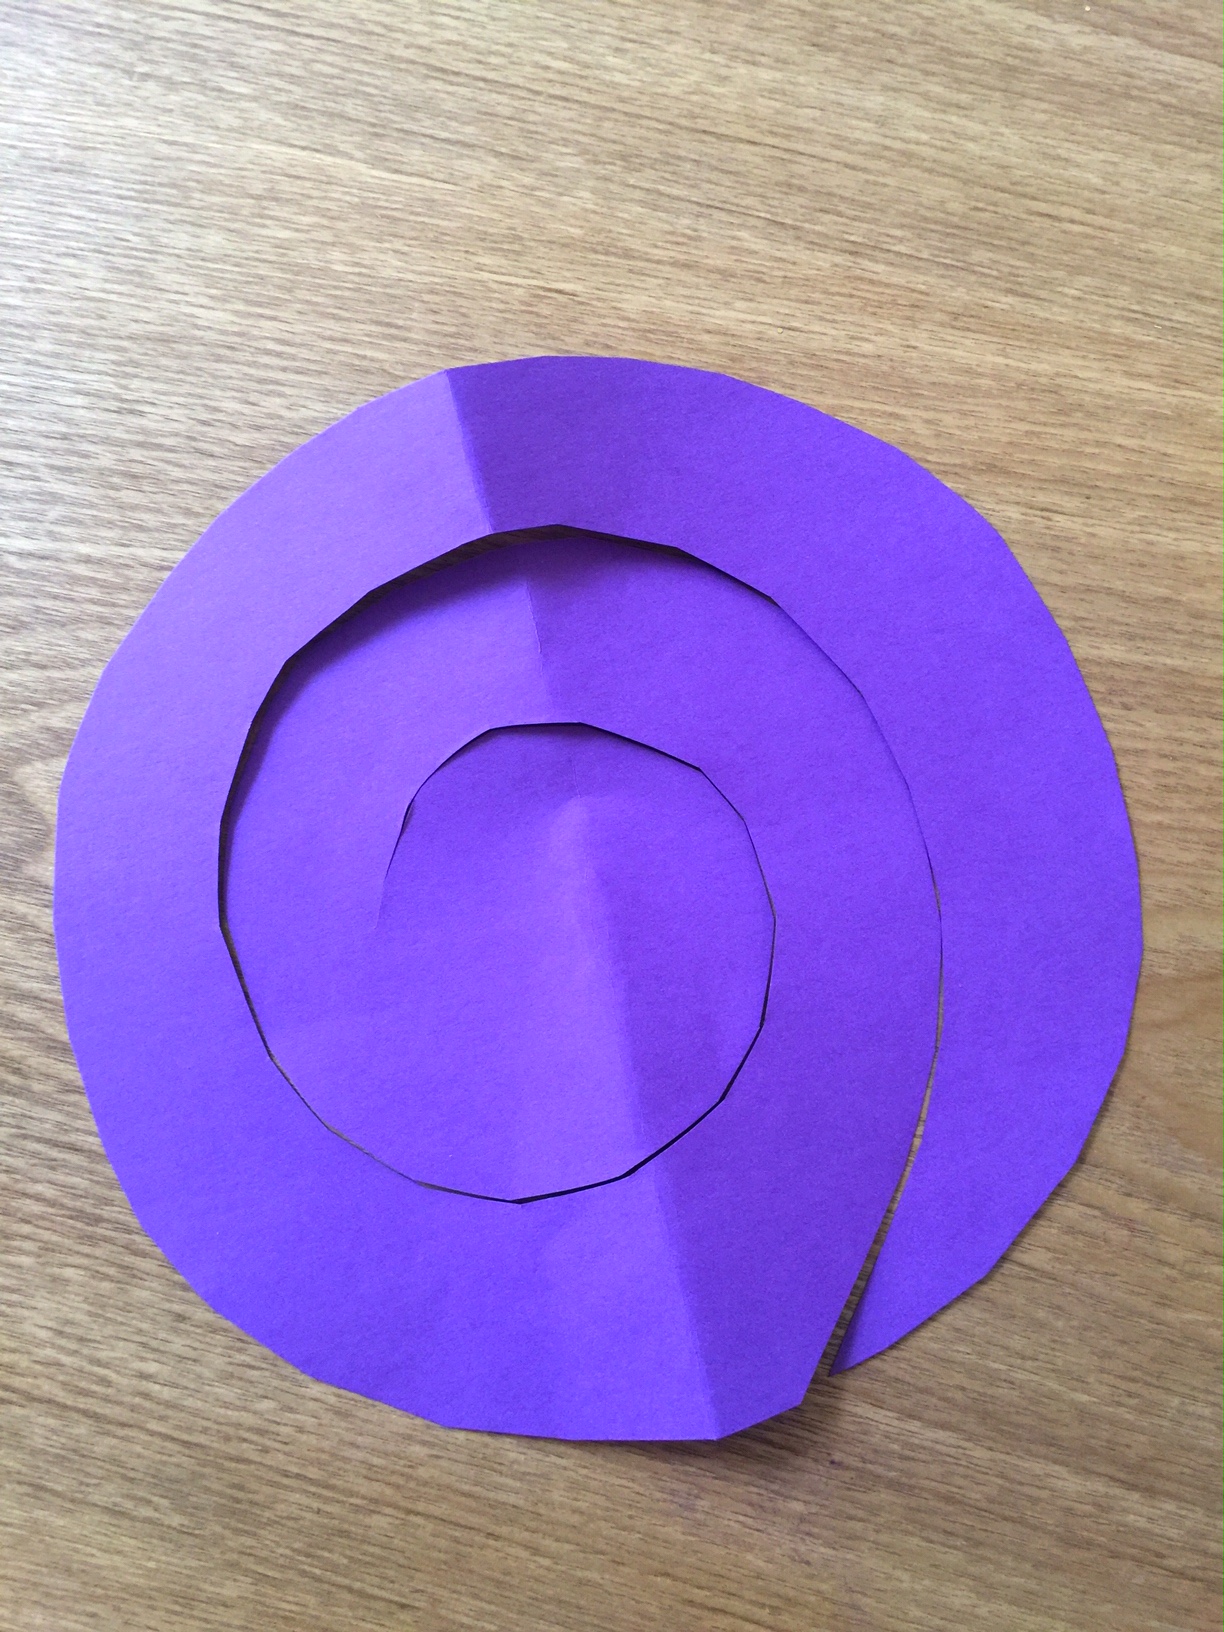
Step 9
Cut a spiral in your circle. Be sure to leave a generous amount in the middle, for the base of your flower.
Step 10
Start at the edge of your spiral and roll a tiny portion, creating a cylinder that will be the middle of your flower. Add a dot of glue, or a piece of tape to secure the middle.
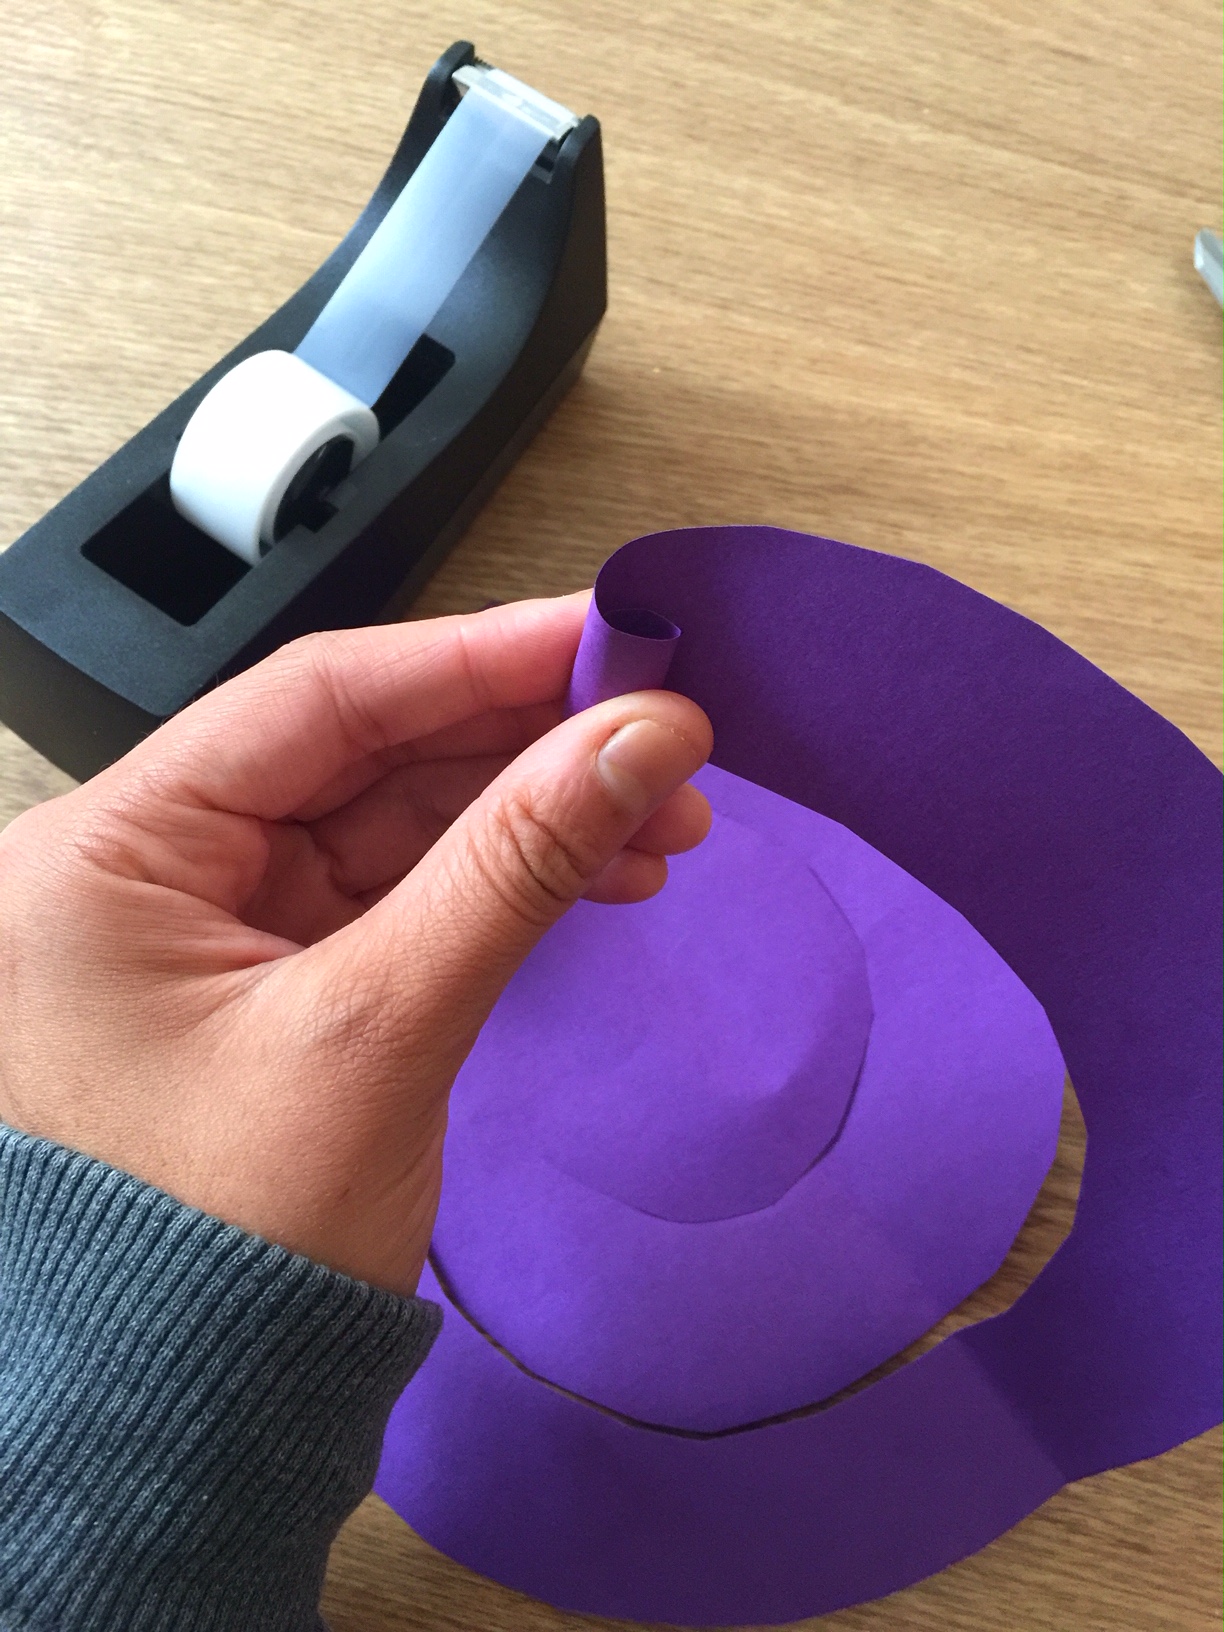
Step 11
Continue rolling your spiral. Every so often, glue a portion of your spiral down, leaving little gaps as you go along.
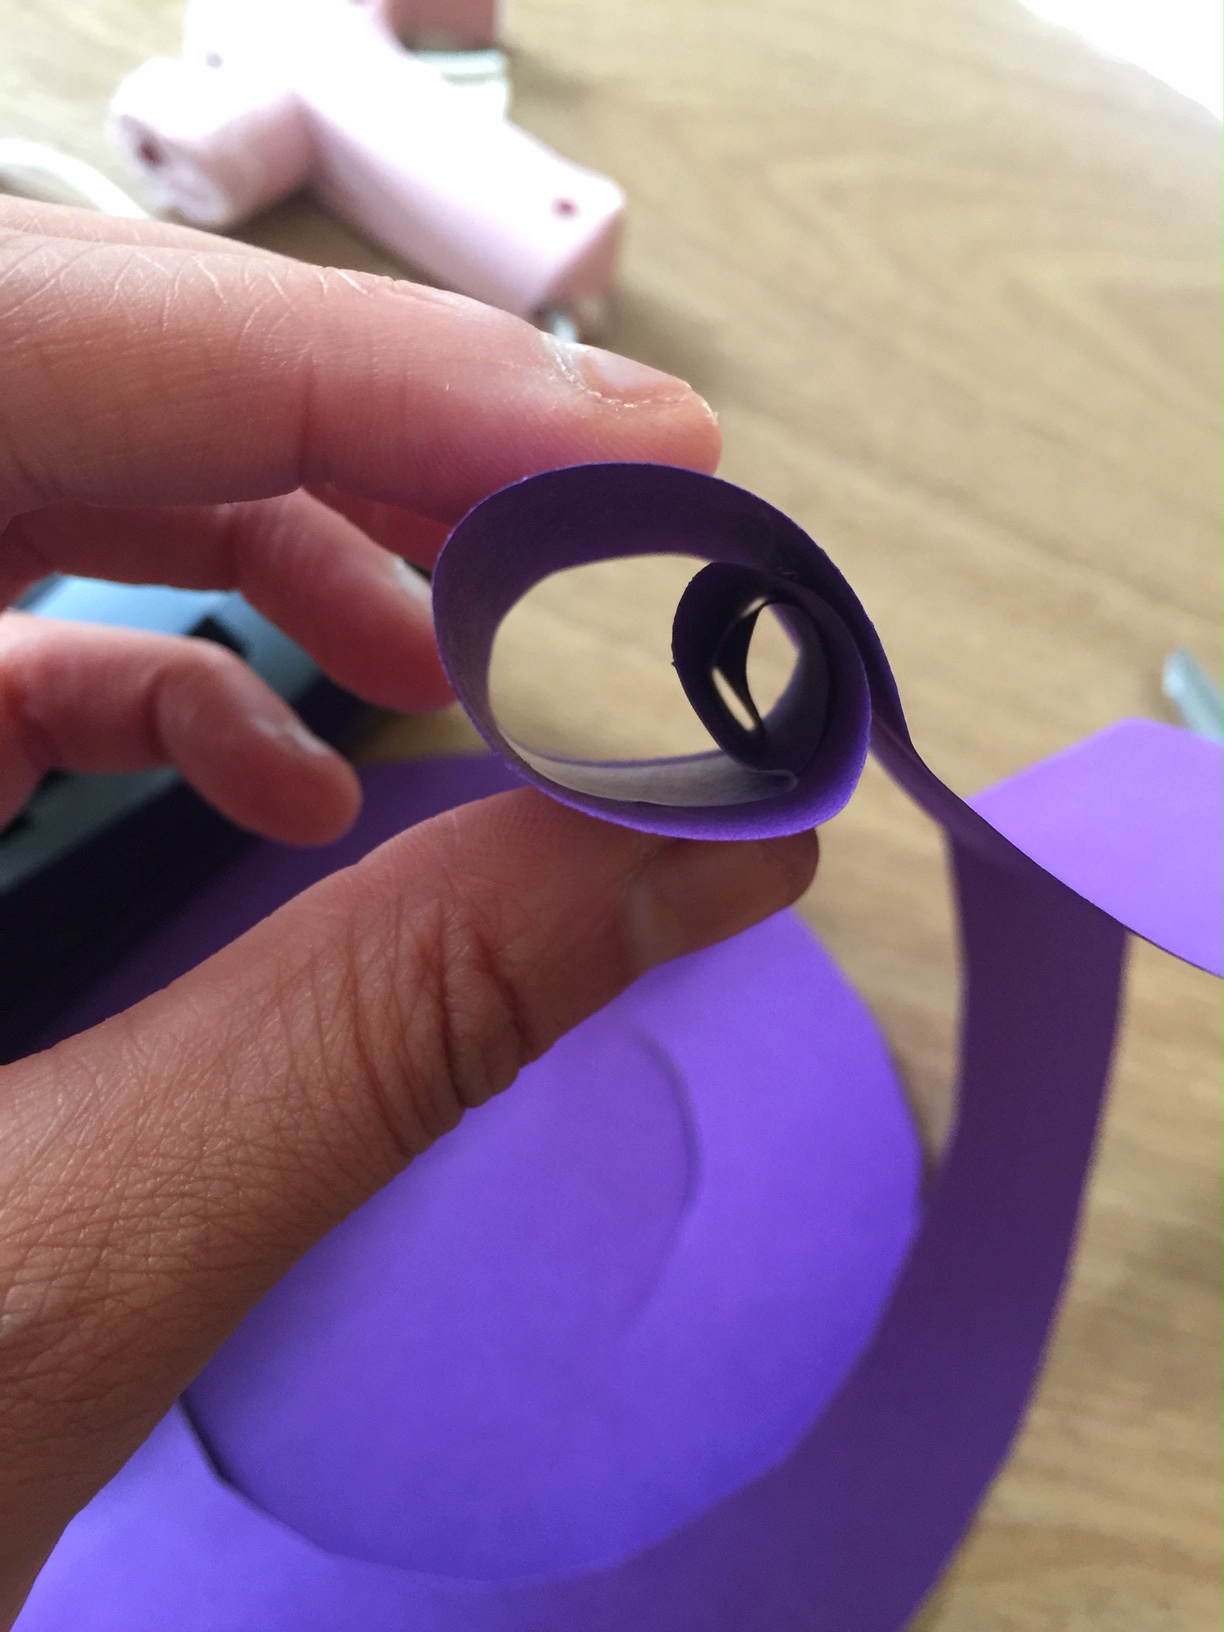
Step
Step 12
When you get to the circle in the middle of your spiral, glue it to the bottom of your spiral. It will look like this when you’re finished.

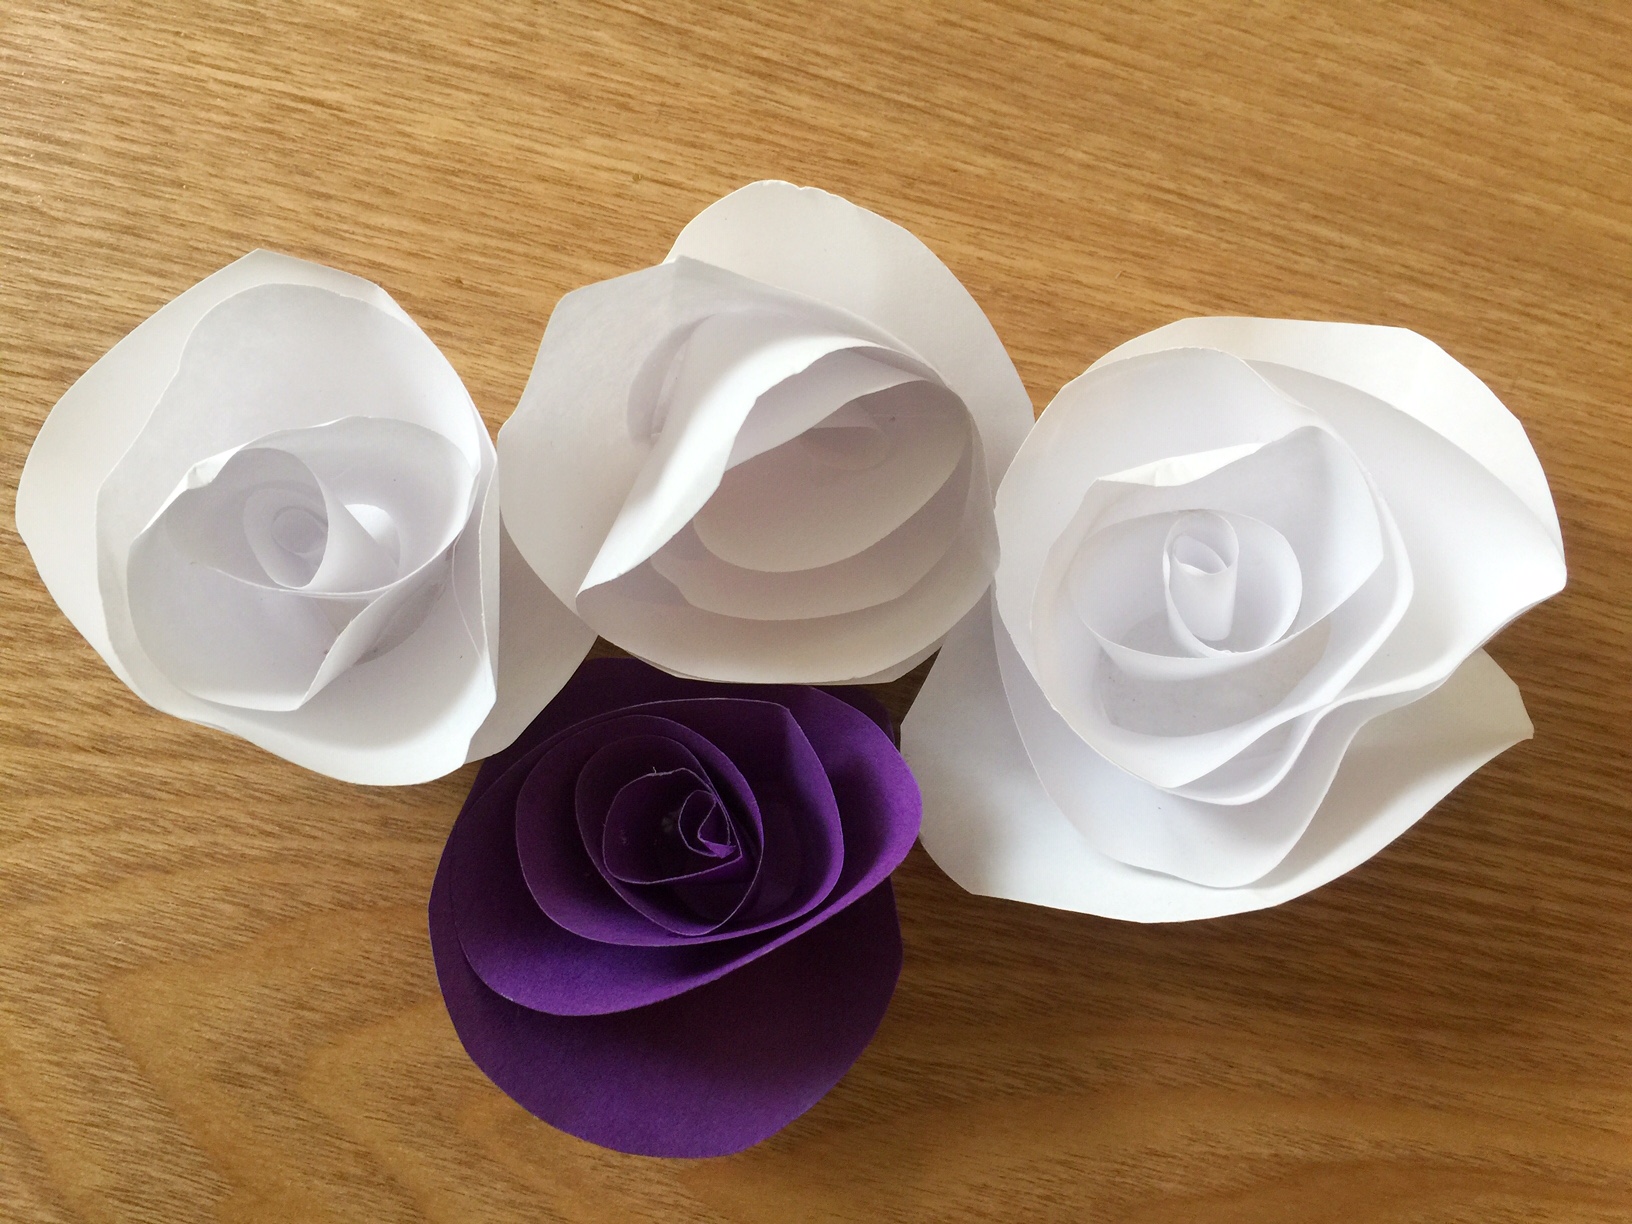
Step 13
Repeat with multiple colors. Cut varying sizes of circles, for different sized flowers.
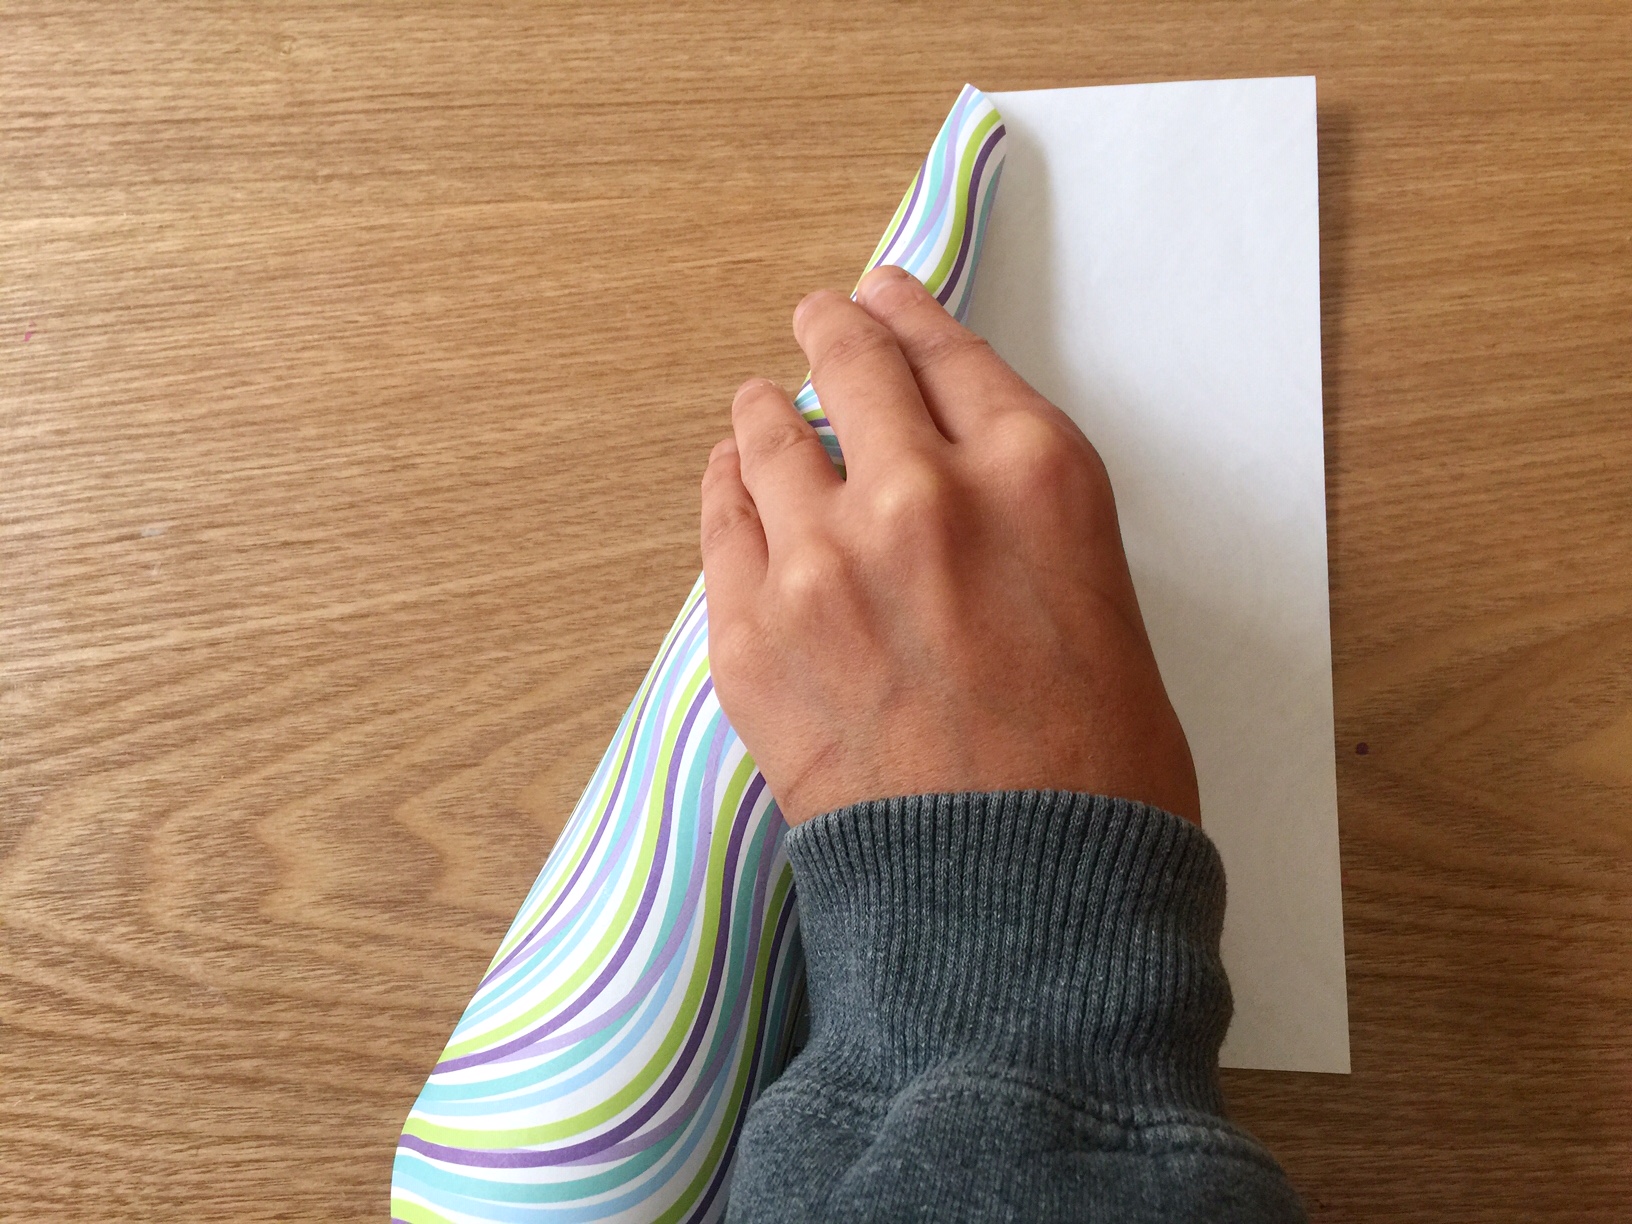
Step 14
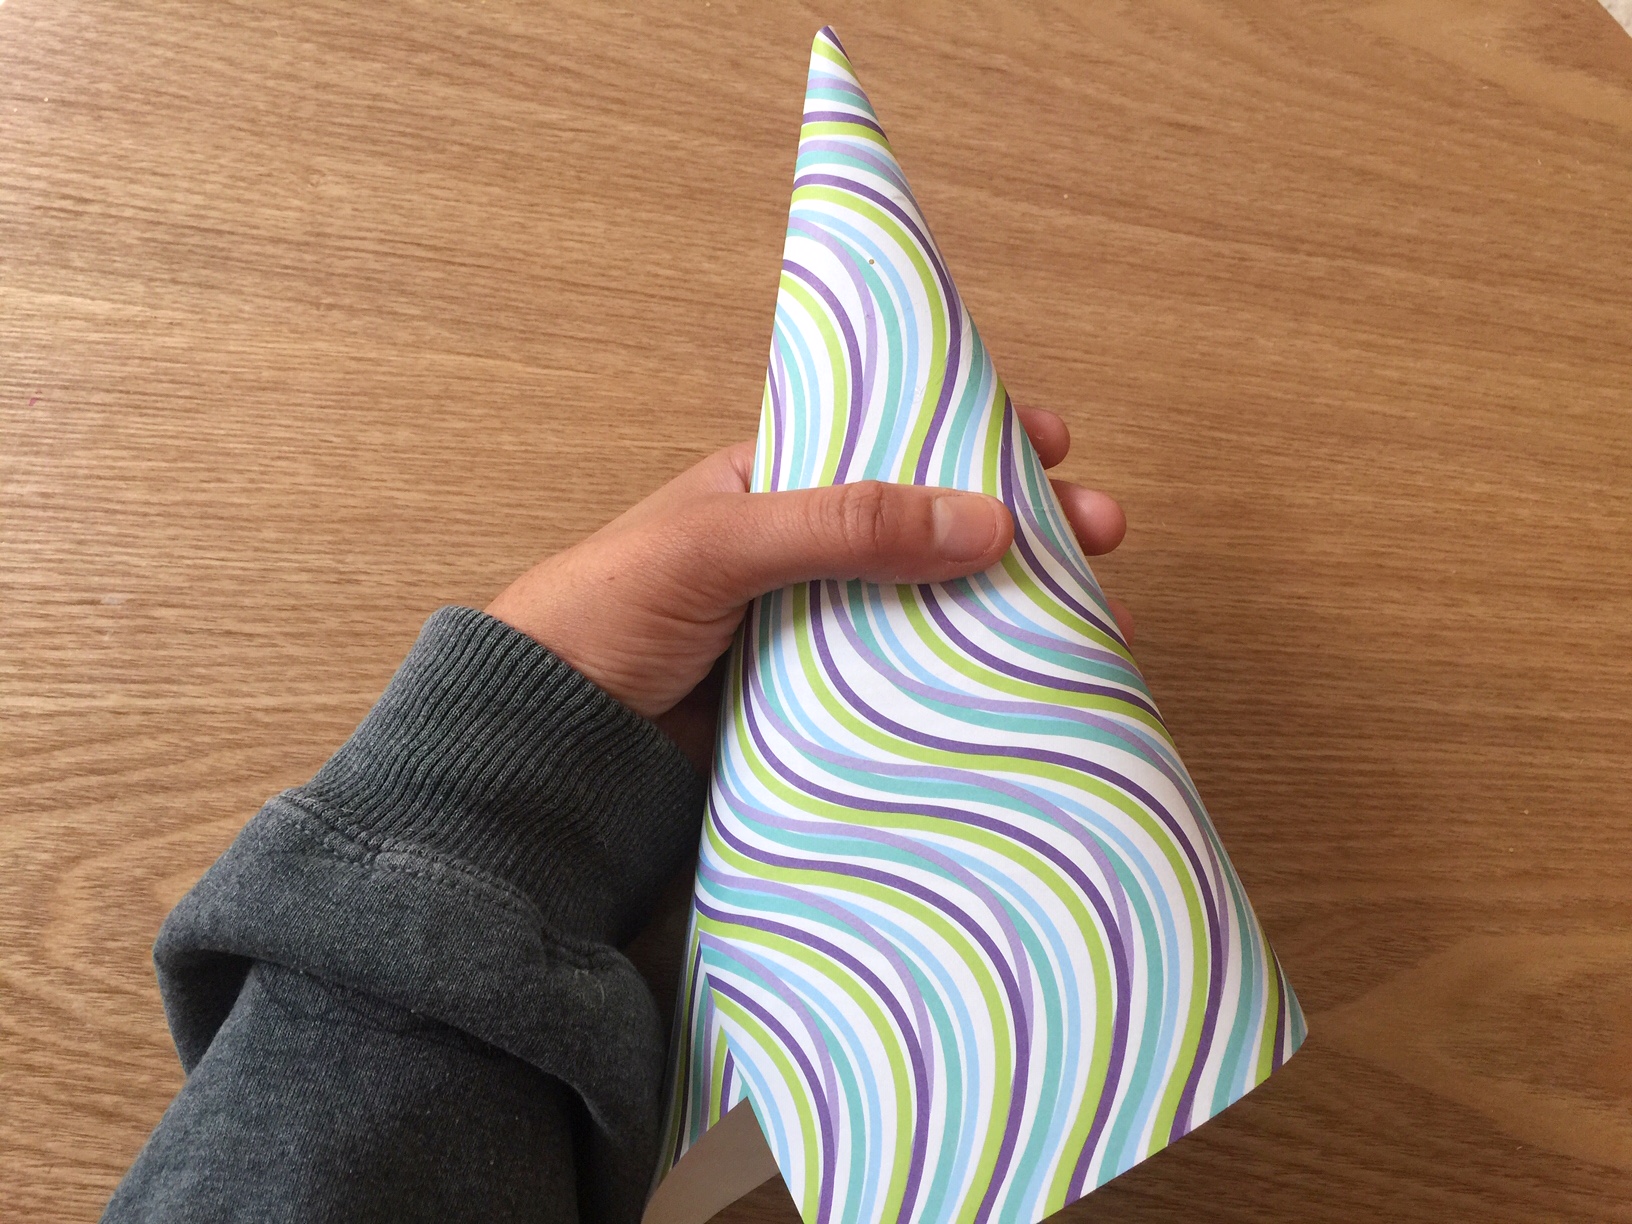
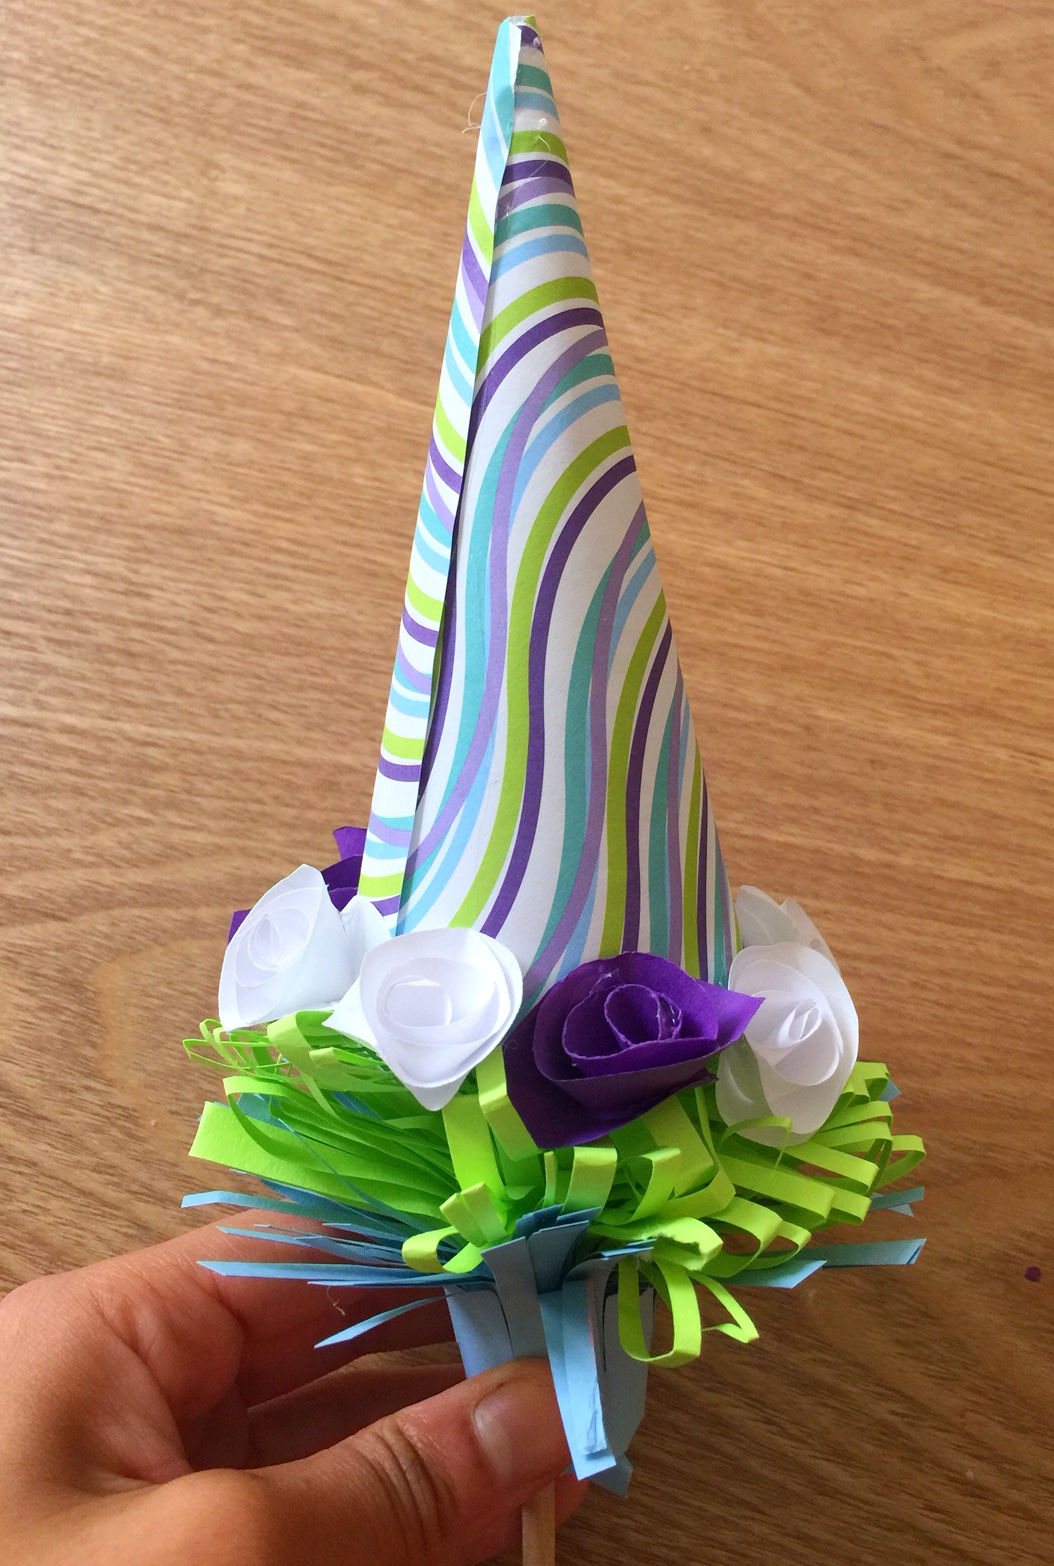
Choose a patterned piece of paper. This will be your unicorn horn. Roll it into a cone shape.
Step 15
Cut the bottom of your horn, so that it’s a size you like.
Step 16
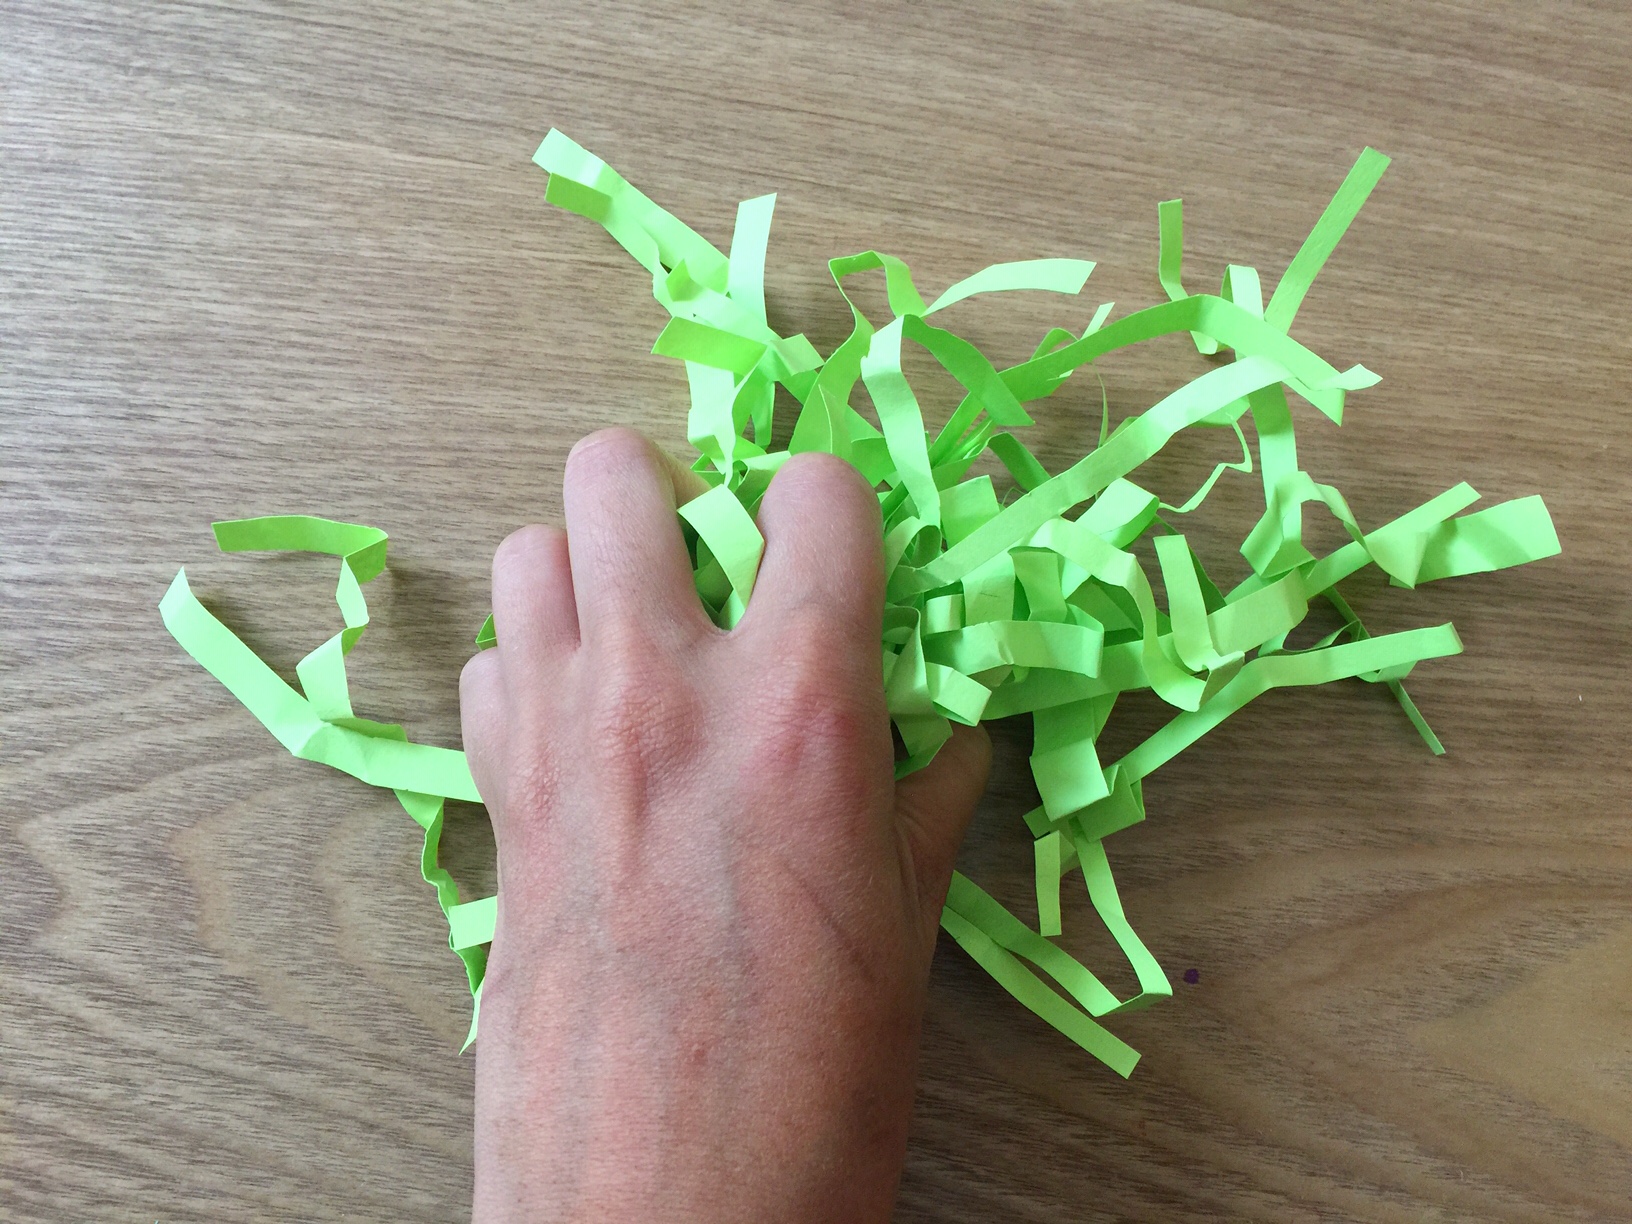
Cut strips of lime green construction paper and scrunch, with your hands.
Step 17
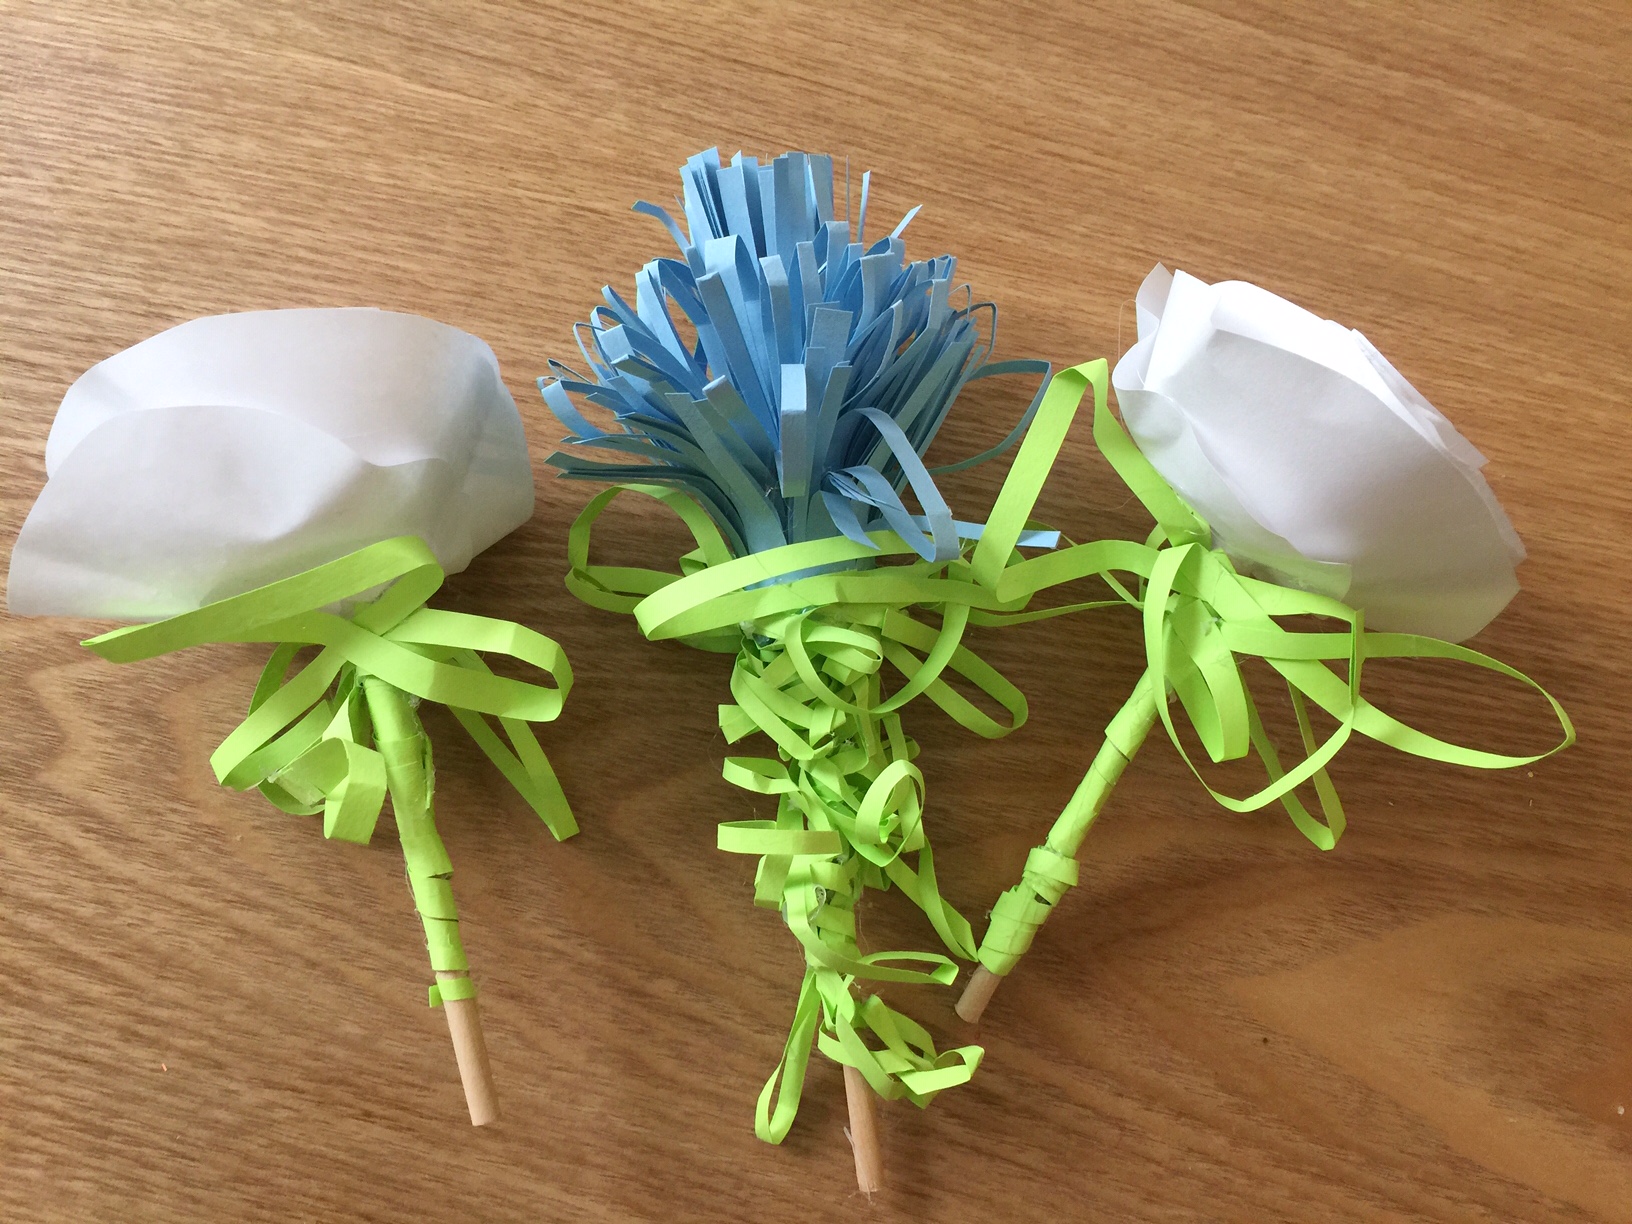
Use your hot glue gun to add wooden dowels to the bottom of your flowers.

Step 18
Use your hot glue gun to add your green strips to the wooden dowels.

Keep adding green strips until your flower stems are full.
Step 19
Add small flowers, pom poms and green strips to the bottom of your unicorn horn, until it’s full and ready to top your bouquet.
Step 20
Add your fairy lights to the bottom of your vase, by allowing them to tangle slightly in a loose ball. Leave your battery box out, so that you can hide it after adding your flowers.

Step 21
Start adding your flowers to your vase. You may need to play with them a little, to get your desired shape.

Step 22
Answer this question: What do unicorns call their dad? (Scroll down for the answer)
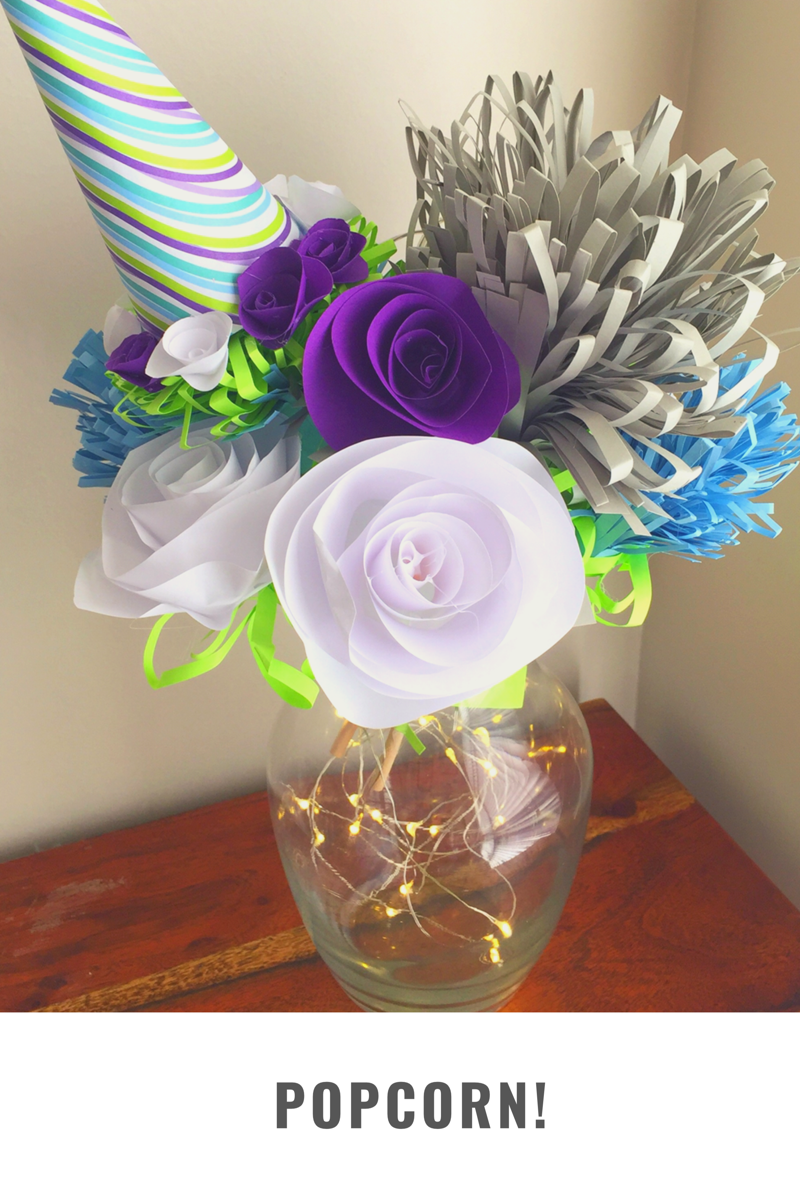
I hope your bouquet makes you feel magical! Comment below and be sure to follow for more simple, fun crafts!
